Schedule Free Estimate
1 Easy Way To Fix a Blister on a Flat Roof
As you’ll find that there are several ways you can do a flat roof repair yourself, in fact, we have discussed one way in this very blog, a few weeks ago and today we’re excited to share another simple and efficient approach to fix small cracks and blisters on your roof. Let’s dive right in!
Tools You’ll Need:
Ladder
Utility Knife
Trowel
Caulk Gun
Fiberglass Mesh
Gravel Stones
Step 1: Slice open flat roof blistered spots with a utility knife.
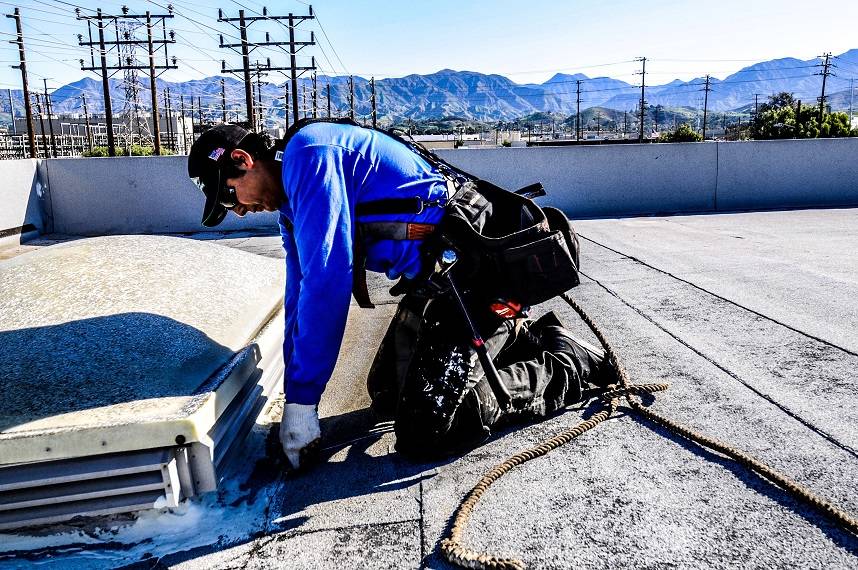
Blisters look like little bubbles on your roof. Pop the blister first by cutting into its center. Be careful to keep the cut shallow, since you don’t want to cut any deeper than the damaged portion. Scrape away the damaged roofing material.
FYI: These spots happen due to trapped moisture and overheating. Check that the roofing underneath the blister is dry before you attempt to patch it. If it feels wet, dry it out first with paper towels.
Step 2. Cut around the damaged area until the membrane rests flat.
For most small punctures, you can repair your roof simply by forcing sealant into them. Sometimes, doing this is difficult. Using a utility knife, make a shallow cut until you can remove material around the spot without damaging the layers underneath it.
Use the damaged portion as a guide. Cut down until you are underneath the damage, then stop so you don’t puncture the rest of the material.
You can lift cracked areas with a trowel. If the roofing material doesn’t lie flat, you should cut narrow strips around the crack until the area is level.
Step 3. Spread a layer of roofing cement with a trowel.
A good roofing cement fills in and waterproofs gaps on all sorts of different types of roofs. Push a layer of cement 1⁄8 in thick into the damaged area. Spread the cement about 6 in beyond the damage, then smooth it out with the trowel. You should no longer be able to see the crack or hole.
It doesn’t have to be a special roof cement, any roofing cement you can find at your local home improvement store will do. Most cement comes in cans. Some sealants are available in caulk tubes which you can spread with a caulk gun.
Small holes and cracks no more than about 1 in wide can be sealed with caulk. Unlike cement, caulk is used to fill gaps. Cement functions as an adhesive, so it’s more useful if you plan on adding waterproofing material over a damaged spot.
Step 4. Lay a piece of fiberglass mesh over the cement.
Fiberglass serves as extra waterproofing for your roof. It comes in rolls, so you will need to cut it to size using a sharp pair of scissors. Push the mesh down to hold it in place in the cement.
Again, you can usually find rolls of mesh at home improvement stores, or shop at roofing supply stores or go online.
Fiberglass scrim is a type of lightweight tape that can be used in place of the mesh. It is good for sealing off long, straight cracks. After filling in the crack with caulk or cement, cover it with the scrim.
Step 5. Cover the mesh with a thick layer of cement.
Open up your can of roofing cement again and spread a layer of it over the entire piece of mesh. Smooth the cement flat with a trowel and add more cement as needed. The final layer of cement should be about 1⁄2 in thick and hide the mesh from view.
Step 6. Add a layer of gravel over the cement to prevent sun damage.
You may have seen rocks on flat roofs and wondered why they are there. A layer of gravel or river stones is often used to protect flat roofs from sun damage. Distribute the rocks evenly over the repaired area, making sure that no part of the roof membrane is visible beneath it. If the rest of your roof isn’t already covered, add stones to protect it.
This layer of ballast absorbs UV rays, preventing sunlight from breaking down the bonds in the roof membrane. Your roof will last longer when it is full of gravel.
You can also purchase a can of reflective coating from a home improvement store and brush it onto your roof.
Conclusion:
In conclusion, addressing blisters and small holes on your flat roof doesn’t have to be a daunting task. By having the right tools and knowing what to do, you can effectively repair these issues with confidence and minimal effort. But it’s important to remember, proactive maintenance and timely repairs contribute significantly to the longevity and resilience of your flat roof, ensuring it continues to provide reliable protection for years to come. Here’s to a well-maintained and leak-free roof!
Central Roofing Company Headquarters
555 W. 182nd Street
Gardena, CA 90248
310-527-6770

Get A Quote
One of our roofing estimators will gladly meet you to discuss your options and follow up with a free, no-obligation, written estimate.
At Central Roofing Company, we understand that a sturdy and reliable roof is crucial for the success and safety of your commercial property. Our team of highly skilled and trained roofing professionals is committed to delivering exceptional craftsmanship and superior service in every project we undertake.
555 W. 182nd St. Gardena, CA 90248
Ph: 310-527-6770
Our Office Locations:
Our Services
CA license #684960 – Central Roofing, 2024 ©All Rights Reserved | Terms of Use | Privacy Policy | Built by Dymic